Proxmox - A Network Inside Network With Vyos - PART 1 - Setting up SDN
This is going to be a multi-part series around my homelab, specifically around Vyos the Open-source Networking OS and Firewall.
- Part 2 - Configuring Vyos
- Part 3 - Configuring Vyos with Ansible
- Part 4 - Configuring Vyos with Jinja Templates + Ansible
- Part 5 - Configuring Vyos Firewall with Jinja + Ansible
First of all, Why would I want a network inside a network? Well, Isolation from my main network is the main one, secondly, it has been fun to learn about.
My plan long term is to be comfortable using VyOS as my home firewall as well as my lab firewall and to use automation like Terraform and Ansible to manage and configure it, but that is for future posts when I get around to that point.
First off, My plan is to use Proxmox SDN(Software Defined Networking) to achieve my network inside a network, then use Vyos in a virtual machine as the man-in-the-middle between my HOME network and my LAB/Network-in-a-Network.
They say a picture is worth a thousand words so let me show you a basic network diagram.
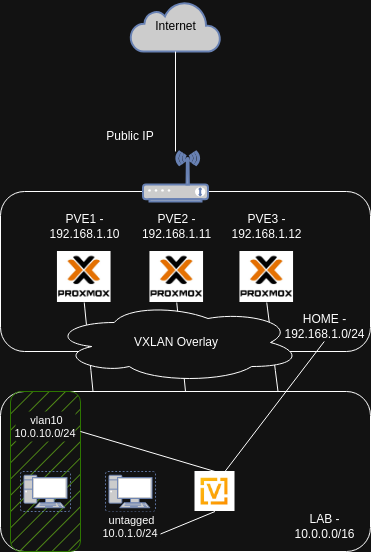
Home network
My home network comprised of a ISP supplied Wi-Fi router/modem, an unmanaged switch(not shown in
drawing as its not important since not using vlans at home… yet), my three Proxmox boxes which
are 3 x Beelink mini-pc Amazon - Non Affiliate
but this should work with anything that can install proxmox. My home network subnet is 192.168.1.0/24
Lab network
Lab network will be a SDN in Proxmox and will be a 10.0.0.0/16 so I can create vlans and tag
interfaces inside and attach an extra interface to the Vyos router/firewall and have evem more isolation.
Getting started
So in this post I will show step by step how to set up Proxmox SDN with VXLAN to be able to have a network inside a network without a managed/smart switch and have it span across your multi-node Proxmox cluster. If you only have one proxmox node you can still do a SDN but VXLAN would be pointless.
Step 1 - Create Proxmox SDN Zone
Within your datacenter view go to SDN > Zones , then Click Add > VXLAN
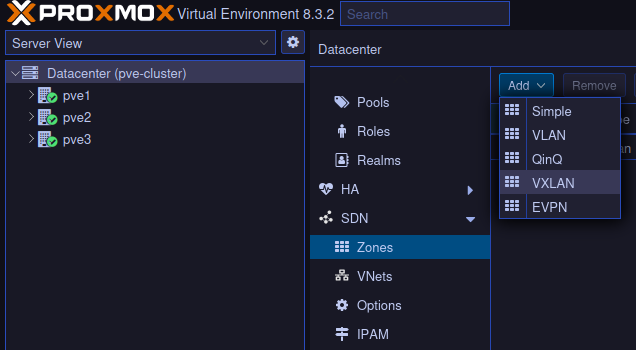
Step 2 - Create Proxmox VXLAN
Within VXLAN , Add an ID, we will call ours ‘VXLAN’ set peer addresses, these are the addresses of
your Proxmox hosts, in my case 192.168.1.10-12, set the MTU to be 1450, this is because vxlan adds
50 extra bytes for encapsulation so we need to drop the default 1500 by 50.
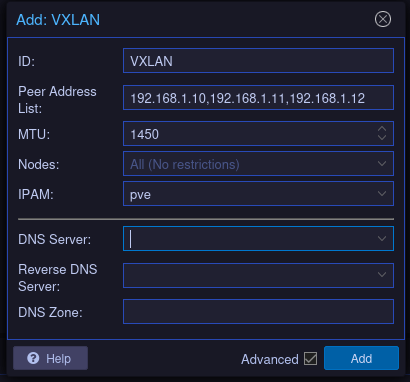
Step 3 - Create Proxmox VNet
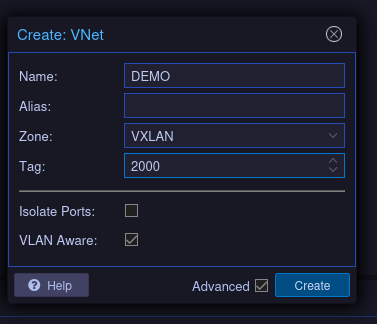
Within SDN, Go over to VNets and Create
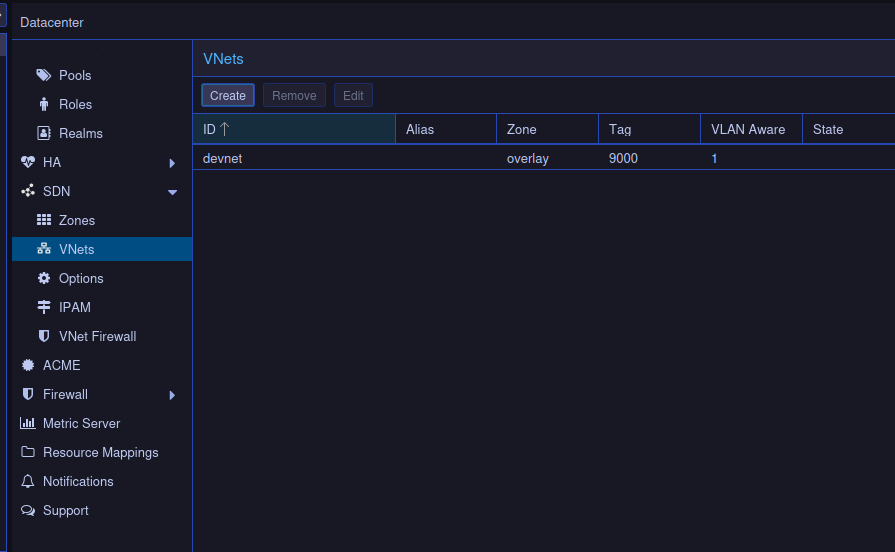
Here we will give it a name DEMO, then select the VXLAN Zone we created earlier, then give it a
tag 2000 but this could be anything. Important to note if we want to use vlans we need to make this
VNet vlan aware.
Step 4 - Applying
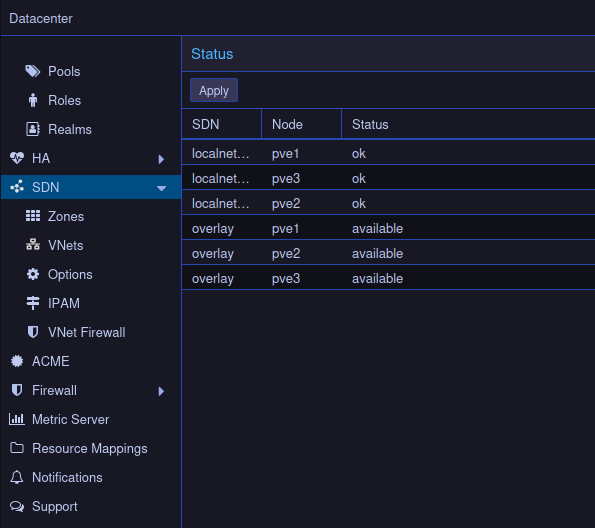
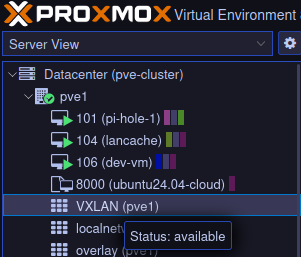
Now creating all these thing doesn’t do anything until we apply, so head back over to ‘SDN’ and Click ‘Apply’ this should apply this network to all your nodes in your cluster
Step 5 - Create VMs
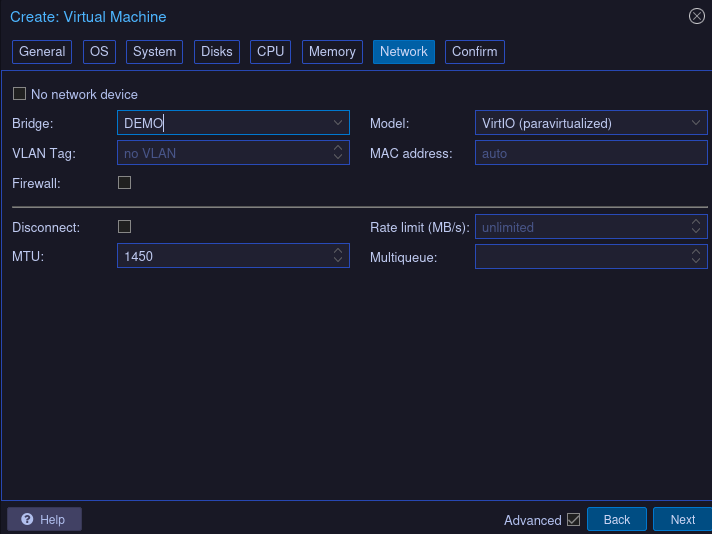
Create some VM’s that you want to live inside this network and when you get to the network tab, select the ‘DEMO’ network we created.
Step 6 - Create VyOS VMs
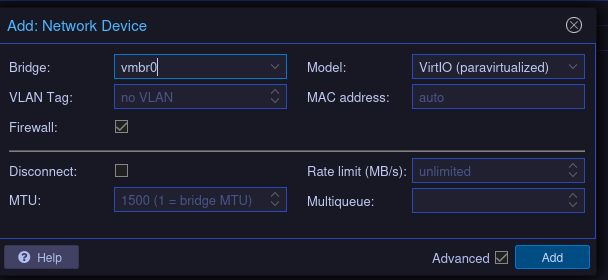
Download Vyos - Rolling from their GitHub page. create a VM using this ISO to boot up. Will need a minimum 2 core, 2GB RAM. When getting to the network section select select the ‘DEMO’ network we created. After creating the VM and before booting it up, go to the hardware tab for the VM and ‘Add > Network Device’ and this time select Network that is in your HOME network, usually this is set up as ‘vmbr0’
Step 7 - Vyos first boot
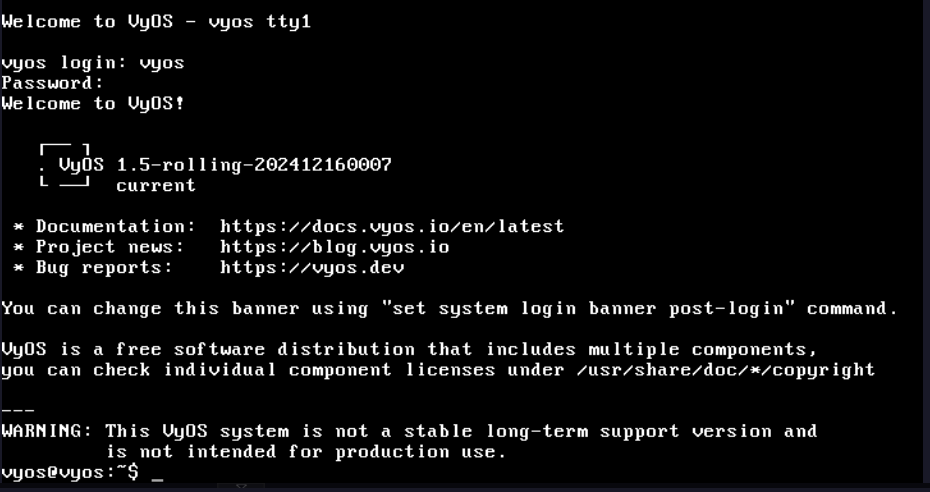
Now we have the Vyos vm set up with an ISO to boot from and two network interfaces, one on HOME network
one on LAB network, lets boot and login. The default login is Username:vyos Password: vyos
Step 8 - Vyos Install
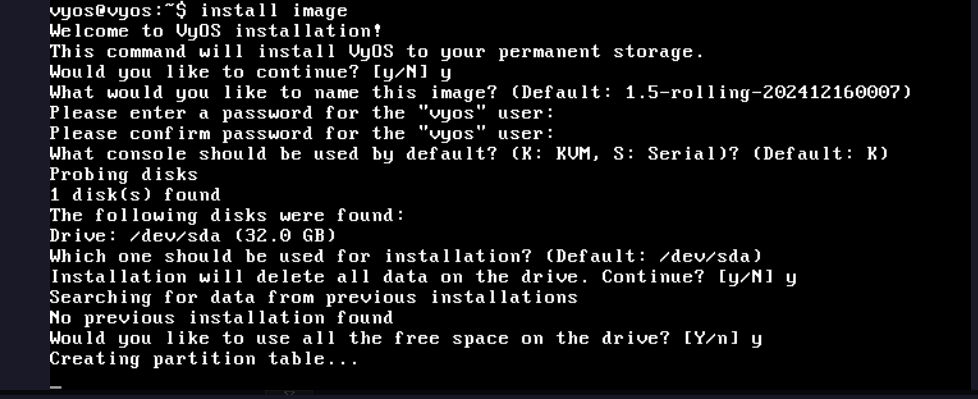
Now we are logged in lets install Vyos to the disk of the VM, we do this by running the install image
command. You will be prompted to name the image, and set a new password for vyos user, you can use vyos
as the password still which is what i will be doing initially until we get to automating the configuration.
For the rest of the prompts you can just go with the defaults and ‘y’ your way through.
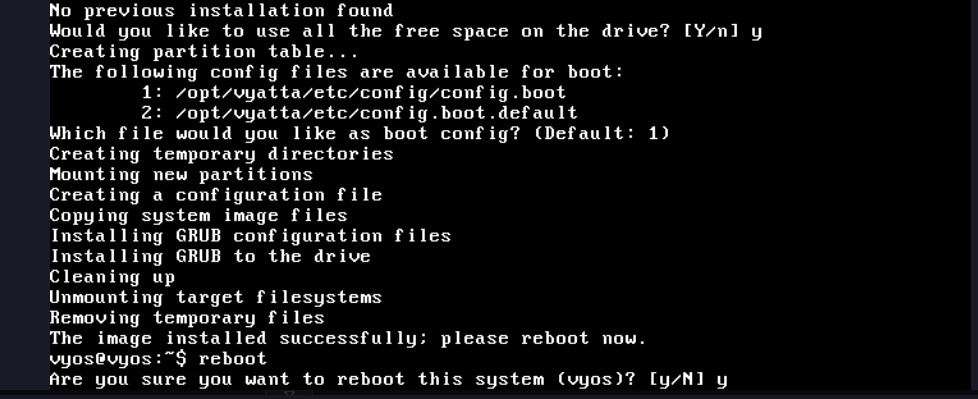
After its installed. Reboot with the reboot command.
Step 9 - Verification
Let Vyos boot back up and login again, after logging in we will do our first ‘Op mode - Operational Mode’
command. show interfaces
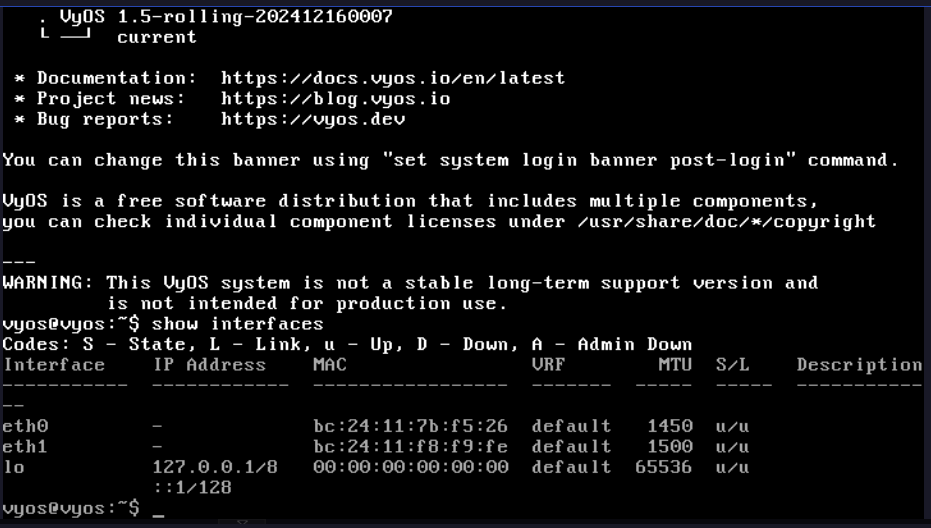
As we can see we have eth0 and eth1, notice the MTU is different on eth0 this is our vxlan
network interface.
In Part2 - Configuring Vyos we will go over the initial set up for Vyos including Setting up:
- Interfaces
- SSH
- Static routes
- DNS
- DNS forwarding
- DHCP servers
- SNAT
- Firewall rules
After that we will look at deleting most of the configuration and doing it in an automated style with Ansible.
Links
- Great video on setting up Proxmox SDN VXLAN Setup - YouTube this gave me the idea for going down this rabbit hole.
- Vyos Docs
- Proxmox Docs