Episode 017 - Ghost 👻 + IFTTT
The Goal
I have been looking to automate posting to twitter about my new blog posts, and I have been looking at the Ghost intergrations.
The goal is simple:
- Create a new post on any of my blogs
- Publish It
- Post to Twitter that I have a new post along with the Title and URL.
Zappier looked to be the way to go, but I thought, I have a IFTTT Pro account that I pay like $2 for per month so why not use that.
In come webhooks
I decided to use webhooks as I thought this would be the easiest way as Ghost don't have a IFTTT applet.
And if you got to this post from my Twitter then the automation worked.
Problem
The main issue I had with this automation was not knowing much about the IFTTT Filter code which you get when you pay for the Pro+ ($5/month - I am on a legacy plan where I only pay $2 sorry). Back to the filter code, Filter code is a bit of JavaScript ES5 flavor, I also couldn't find great examples of how to parse JSON using JavaScript to then use in my IFTTT automation, This is probably down to me not knowing any JavaScript.
After lots of looking through lots of documentation:
- Building with filter code
- Example Applets using queries and filter code
- Get random strings from an array with no duplicates
- How to add filter code
- Parsing JSON body with filter code
I couldn't get a clear example of how to do what was close to what I needed, so after lots of messing around I managed to get it working and this is where I thought i would share with you lot.
Pre-requisites
- A ghost blog (Although this could apply to anything that can send a webhook)
- An IFTTT Pro+ account (Not an affiliate Link)
- 20 Minutes
- IFTTT Webhook address + key IFTTT Then click on Documentation, should look like

The Steps IFTTT
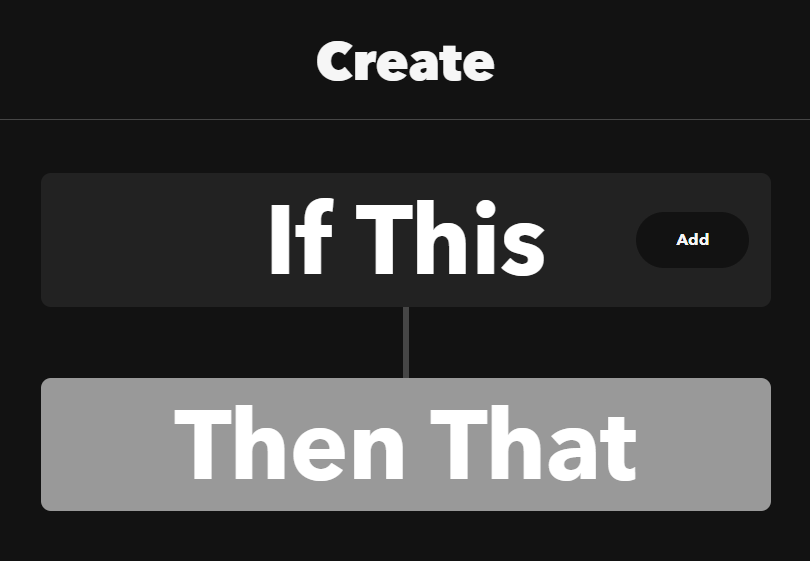
- Head on over to IFTTT and Login
- Click on 'Create' to Create a new Applet
- Should have something that looks like this
4. Click 'Add'
5. Search for Webhook
6. Make sure you click the 'Receive a web request with a JSON payload'
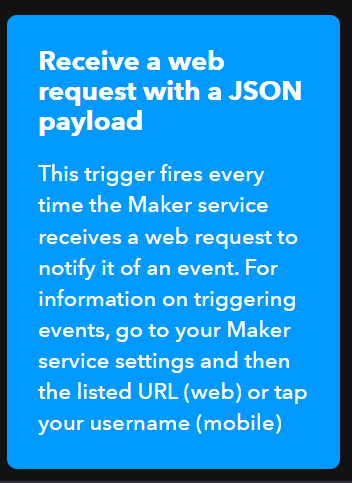
7. Name it anything you like I used new_post
8. Then clik 'Add' for the 'Then That' Section
9. Select Twitter ( You will need to connect to your account the first time you use it )
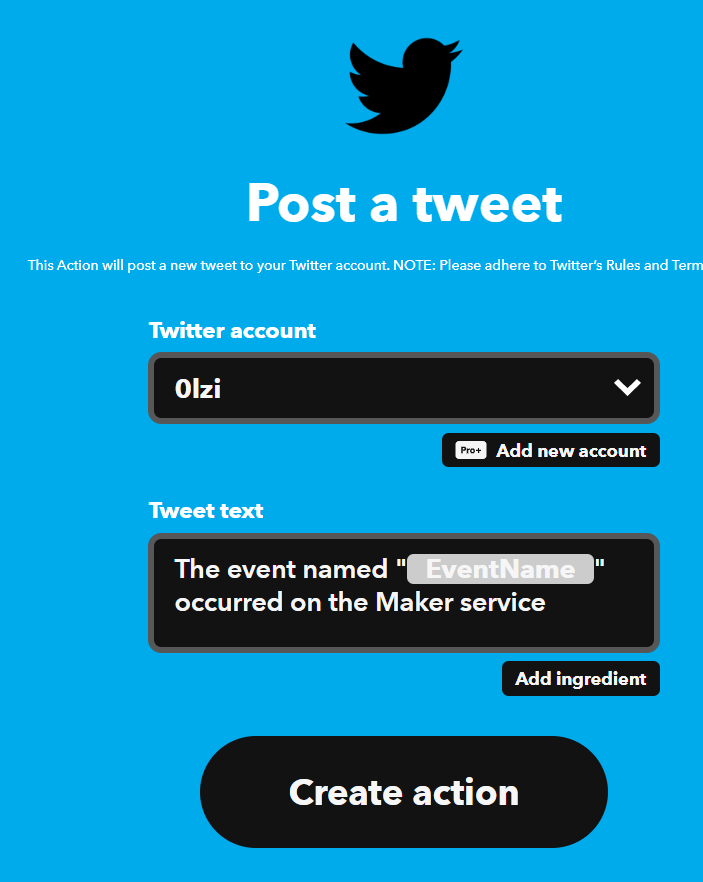
10. Fill in the required 'Tweet Text' This can be anything as the filter text will ammend this.
11. Now click the (+) between 'If' and 'Then' and select 'Filter code'

12. Here is the code I used to get it to work
let payload = JSON.parse(MakerWebhooks.jsonEvent.JsonPayload)

const title = payload.post.current.title;
const url = payload.post.current.url;
const message = `Check out my new blog post: ${title} @ ${url}`;

Twitter.postNewTweet.setTweet(message);
- Click 'Update Filter'
- Then 'Update' at the bottom of your Applet
Should now look like this:
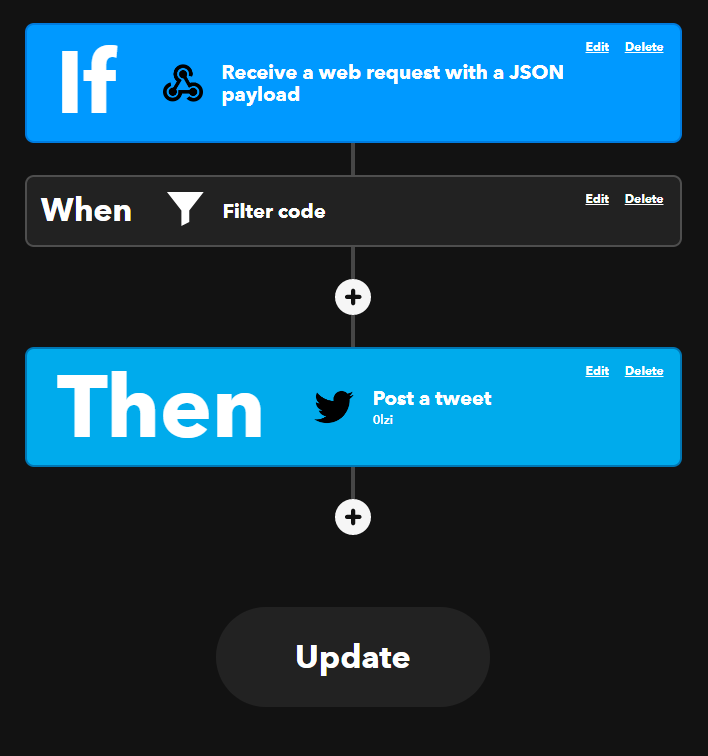
Thats it for IFTTT.
Now to set up Ghost side.
The Steps Ghost 👻
- Login to your Ghost site admin panel ( https://[blogname].com/ghost )
- Go to Settings cog in the bottom left
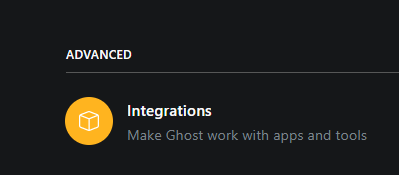
- Go to Intergrations
- At the bottom Click ' + Add custom intergration '
- Give it a name 'IFTTT' for example
- Click ' + Add Webhook '
- Give it a name
- Select an Event , For me it was Post Published
- Then the Taget URL you can get from your webhook documentation page, should look like this
https://maker.ifttt.com/trigger/{event}/json/with/key/{your_key} - Now paste that in and change {event} to what you named in IFTTT set up step 7. in our example we used new_post so the final url would look like this
https://maker.ifttt.com/trigger/new_post/json/with/key/{key}
And thats it set up.
Now to get to this point I had to work out what Ghost was sending as a JSON. I used typedwebhook.tools which will give you a webhook URL where you can point Ghost to. Follow Ghost steps and use that URL and when you publish a post it will display what Ghost sent.
Heres an example
{
  "post": {
    "current": {
      "id": "redacted",
      "uuid": "redacted",
      "title": "test",
      "slug": "test",
      "mobiledoc": "{\"version\":\"0.3.1\",\"ghostVersion\":\"4.0\",\"markups\":[],\"atoms\":[],\"cards\":[],\"sections\":[[1,\"p\",[[0,[],0,\"\"]]]]}",
      "html": null,
      "comment_id": "redacted",
      "plaintext": null,
      "feature_image": null,
      "featured": false,
      "status": "published",
      "visibility": "public",
      "email_recipient_filter": "none",
      "created_at": "2023-04-19T16:12:54.000Z",
      "updated_at": "2023-04-19T16:12:59.000Z",
      "published_at": "2023-04-19T16:12:59.000Z",
      "custom_excerpt": null,
      "codeinjection_head": null,
      "codeinjection_foot": null,
      "custom_template": null,
      "canonical_url": null,
      "newsletter_id": "redacted",
      "tags": [],
      "tiers": [
        {
          "id": "redacted",
          "name": "Free",
          "slug": "free",
          "active": true,
          "welcome_page_url": null,
          "visibility": "public",
          "monthly_price_id": null,
          "yearly_price_id": null,
          "description": null,
          "type": "free",
          "created_at": "2023-04-13T17:05:13.000Z",
          "updated_at": "2023-04-13T17:05:13.000Z"
        },
        {
          "id": "redacted",
          "name": "Super special blog",
          "slug": "default-product",
          "active": true,
          "welcome_page_url": null,
          "visibility": "public",
          "monthly_price_id": null,
          "yearly_price_id": null,
          "description": null,
          "type": "paid",
          "created_at": "2023-04-13T17:05:14.000Z",
          "updated_at": "2023-04-13T17:12:43.000Z"
        }
      ],
      "primary_tag": null,
      "url": "https://blog.0lzi.com/test/",
      "excerpt": null,
      "og_image": null,
      "og_title": null,
      "og_description": null,
      "twitter_image": null,
      "twitter_title": null,
      "twitter_description": null,
      "meta_title": null,
      "meta_description": null,
      "email_subject": null,
      "frontmatter": null,
      "feature_image_alt": null,
      "feature_image_caption": null,
      "email_only": false
    },
    "previous": {
      "status": "draft",
      "updated_at": "2023-04-19T16:12:54.000Z",
      "published_at": null,
      "newsletter_id": null,
      "tiers": [
        {
          "id": "redacted",
          "name": "Free",
          "slug": "free",
          "active": true,
          "welcome_page_url": null,
          "visibility": "public",
          "monthly_price_id": null,
          "yearly_price_id": null,
          "description": null,
          "type": "free",
          "created_at": "2023-04-13T17:05:13.000Z",
          "updated_at": "2023-04-13T17:05:13.000Z"
        },
        {
          "id": "redacted",
          "name": "Super special blog",
          "slug": "default-product",
          "active": true,
          "welcome_page_url": null,
          "visibility": "public",
          "monthly_price_id": null,
          "yearly_price_id": null,
          "description": null,
          "type": "paid",
          "created_at": "2023-04-13T17:05:14.000Z",
          "updated_at": "2023-04-13T17:12:43.000Z"
        }
      ]
    }
  }
}
If you want to add more to your tweet edit your filter code to add more variables to your message.
If you wanted to get "name": "Super special blog", Then edit your filter code
let payload = JSON.parse(MakerWebhooks.jsonEvent.JsonPayload)

const title = payload.post.current.title;
const url = payload.post.current.url;
const name = payload.post.current.tiers[1].name;
# As this is in the tiers part of the JSON but the second section

const message = `Check out my new ${name} post: ${title} @ ${url}`;

Twitter.postNewTweet.setTweet(message);
The output of your Tweet should look like
Check out my Super special blog post: test https://blog.0lzi.com/test/
Let me know your thoughts over on twitter or email feedback@0lzi.com